... but I've also been painting a Rolls Royce staff car for my Turkish commander.
It's a flea market find given a quick coat of Vallejo Brown Violet (a paint that is conspicuously neither brown nor violet). Brass for the metal fittings, Russian Uniform for the folded top and Flat Brown for the seats.
The driver is converted from, of all things, a Subbuteo substitute figure. I've given him a woollen cap to match my infantry but his has the purple crown of late war transport troops.
If I'd had more time I'd have done a better job on the paintwork and added a steering wheel! I'd also have not risked spraying it with an old can of (not actually matt) matt varnish.
Friday, March 31, 2017
Monday, March 27, 2017
My Turks
My final contribution to the forces required for Crisis Point is to boost up the Turks. Most of these will be provided by Will McNally but a Tumbling Dice unit pack purchased at Vapnartak gives us this below-strength platoon/battalion.
The unit consists of a two-man HQ (the commander and senior NCO), two units each of eight riflemen and a two man light machine-gun team, and a three-man medium machine-gun team which can be depicted firing or moving.
The light machine-guns are German MG08/15 models.
The medium MG is the MG08 on its heavy 'quadripod' mount.
And here's the HQ. You can see that all of the figures are wearing the army's winter headgear of an artificial lambswool cap. The crowns of the caps are in the infantry colour of dark green. The caps have moulded-on crosses on their crowns. My, admittedly limited, research suggests that this is wrong. ORs' caps should have plain tops whilst officers' should have a six-armed 'asterisk' shape in gold lace (see the bimbashi below).
The unit consists of a two-man HQ (the commander and senior NCO), two units each of eight riflemen and a two man light machine-gun team, and a three-man medium machine-gun team which can be depicted firing or moving.
The light machine-guns are German MG08/15 models.
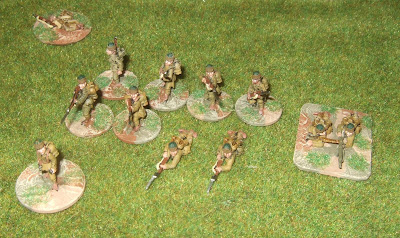 |
| The first rifle section/company |
 |
| The second rifle section/company |
And here's the HQ. You can see that all of the figures are wearing the army's winter headgear of an artificial lambswool cap. The crowns of the caps are in the infantry colour of dark green. The caps have moulded-on crosses on their crowns. My, admittedly limited, research suggests that this is wrong. ORs' caps should have plain tops whilst officers' should have a six-armed 'asterisk' shape in gold lace (see the bimbashi below).
 |
| The Bimbashi (CO) and the Bascavus (Sergeant Major) |
Saturday, March 25, 2017
Andreivian Army 1918
This evening I finished the Andreivian Army forces I'll be providing for Crisis Point 2017 (in just two weeks' time).
We're bath-tubbing the formations this time so platoons will represent battalions. The formations you'll see below exist simultaneous at two levels. Kinda non-local superposition if you'll allow me a little Deepak Chopra-style bullshit.
First up we have the army formations proper. Two infantry platoons/battalions, a tank troop/battalion, an armoured car unit and the company/brigade HQ.
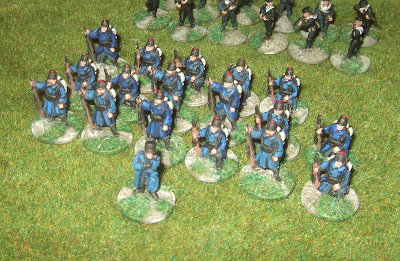
The mass of the infantry are armed with bolt-action rifles and wear French-inspired uniforms. They are mostly converted Airfix Foreign Legionnaires with a few French and German WW1 officers.
The rifle grenade team/company are simple conversions of more legionnaires...
We then get the non-army types. Firstly there's a police battalion - actually early war Belgians but they'll do. Metal figures; not sure by whom.
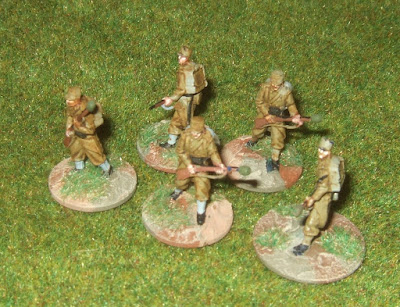
Then there's a bunch of sailors pressed into an infantry role. FAA Russian Black Sea Fleet figures...
More to come shortly; in particular the Turks!
We're bath-tubbing the formations this time so platoons will represent battalions. The formations you'll see below exist simultaneous at two levels. Kinda non-local superposition if you'll allow me a little Deepak Chopra-style bullshit.
First up we have the army formations proper. Two infantry platoons/battalions, a tank troop/battalion, an armoured car unit and the company/brigade HQ.
The mass of the infantry are armed with bolt-action rifles and wear French-inspired uniforms. They are mostly converted Airfix Foreign Legionnaires with a few French and German WW1 officers.
The rifle grenade team/company are simple conversions of more legionnaires...
We then get the non-army types. Firstly there's a police battalion - actually early war Belgians but they'll do. Metal figures; not sure by whom.
Then there's a bunch of sailors pressed into an infantry role. FAA Russian Black Sea Fleet figures...
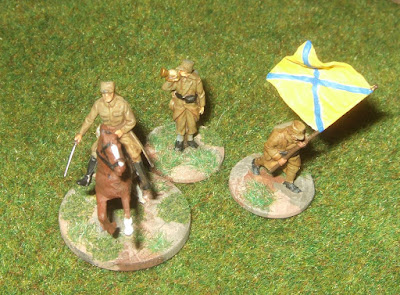
And finally, the company/brigade HQ. More Airfix FFL conversions and a flag-bearer from the WW1 French box with a head transplant from the FFL set.
Thursday, March 23, 2017
The Woebetides Revisited
In the early years of the current century I ran a play-by-email campaign set during the Second World War on the fictional Woebetide Islands in the Indian Ocean. Having recently found my notes of the campaign I thought I'd share some of them here.
The Woebetide Islands were first settled by people from Africa (now known as the Woebetideus) in about the 14th Century AD.
In the early 16th century Portuguese missionaries arrived and began to convert the natives to Christianity but this process does not seem to have been very advanced when the islands fell under Arab domination.
The islands rules by a series of piratical Arab chieftains, the Walis of Smut until the mid-18th century when they were seized first by the French and then by British. Control changed hands several times over the next hundred years until, in 1869, a treaty was signed giving the north-eastern part of the islands to France and the south-western part to Britain.
The population of the towns and coastal villages is largely Arab or Arabised African and Indian. They fish and grow rice on the flat coastal plains.
The central highlands, where not cleared for plantation, are steep and heavily forested. The native people practice semi-nomadic slash and burn agriculture and worship the spirits of their ancestors and of the nature around them.
The islands’ climate is hot and humid. A wet monsoon blows from the south-west between May and October.
The main produce of the islands comes from plantations. British Woebetide is the Empire’s main producer of mangoes. Mango chutney has played a vital role in history of the British Raj and its importance to the continued health of the Empire cannot be overestimated.
 |
| A French bomber over the Woebetides |
Players’ Briefing – Woebetide History and Geography
HistoryThe Woebetide Islands were first settled by people from Africa (now known as the Woebetideus) in about the 14th Century AD.
In the early 16th century Portuguese missionaries arrived and began to convert the natives to Christianity but this process does not seem to have been very advanced when the islands fell under Arab domination.
The islands rules by a series of piratical Arab chieftains, the Walis of Smut until the mid-18th century when they were seized first by the French and then by British. Control changed hands several times over the next hundred years until, in 1869, a treaty was signed giving the north-eastern part of the islands to France and the south-western part to Britain.
Geography
Grand Woebetide, the main island, has two main towns – Jamestown, the British capital, and Charleville, the French capital.The population of the towns and coastal villages is largely Arab or Arabised African and Indian. They fish and grow rice on the flat coastal plains.
The central highlands, where not cleared for plantation, are steep and heavily forested. The native people practice semi-nomadic slash and burn agriculture and worship the spirits of their ancestors and of the nature around them.
The islands’ climate is hot and humid. A wet monsoon blows from the south-west between May and October.
The main produce of the islands comes from plantations. British Woebetide is the Empire’s main producer of mangoes. Mango chutney has played a vital role in history of the British Raj and its importance to the continued health of the Empire cannot be overestimated.
Tuesday, March 14, 2017
Flea Market Finds
My weekly check on the flea market in Sheffield turned up trumps this time. I always look out for boats I can convert into warns models and this time I've found two.
The first find was this chap from the Tomy Thomas the Tank Engine range:
I suspect it will make some kind of motorised landing barge, though I'm not sure I'll get anything done with it before April's game.
The same probably applies to this Rolls Royce, which I'd ideally have ready for use by the Turks in Andreivia.
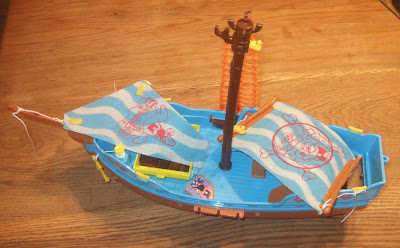
To the manufacturer it may be a Spongebob Squarepants Pirate Ship but to me it has every prospect of becoming a 28mm scale sloop. It's about 18" long to the tip of the bowsprit and I knew at once I was going to have it. When the asking price turned out to be £1... well, it would have been rude not to....
I can see it making an excellent addition to a future set up for The Pikeman's Lament. Indeed Michael Leck has already done something similar. I intend to take inspiration from his work (or if you prefer, to steal his ideas!).
The first find was this chap from the Tomy Thomas the Tank Engine range:
I suspect it will make some kind of motorised landing barge, though I'm not sure I'll get anything done with it before April's game.
The same probably applies to this Rolls Royce, which I'd ideally have ready for use by the Turks in Andreivia.
The star find, though, was this...
To the manufacturer it may be a Spongebob Squarepants Pirate Ship but to me it has every prospect of becoming a 28mm scale sloop. It's about 18" long to the tip of the bowsprit and I knew at once I was going to have it. When the asking price turned out to be £1... well, it would have been rude not to....
Monday, March 13, 2017
Just Like an Arrow
It's not often I get to use a Magnum song title in a post here but it seemed appropriate. Alternatively I could have quoted Case Hardin, "Been lied to be every road sign, crossed every white line...".
Whilst checking my emails this morning I came across this on the desk:
It's a piece of stiff plastic of the kind you find stiffening the collar of a new shirt. I guess it came out of some item of clothing newly bought by a member of the family.
The cut-out arrow is 11mm long. To anyone else it would be a piece of rubbish bound for the bin. To me it's clearly a stencil for adding direction markings to 1/300th scale tarmac roads.
Sunday, March 12, 2017
Grrrrrrrr!
OK so this may be one of the most annoying sets of figures I've ever tried to assemble. And I've built the Airfix British Hussars where half of the horses don't fit the bases properly.
The set comes as three identical sprues each featuring three Jaegers on bicycles. The problem starts with the fact that they are made from a soft, almost rubbery plastic that doesn't take glue well. The figures come in four or five parts - bicycle, handle bars, soldier and one or two separate arms.
The figures seat quite nicely on the bikes. Each has a tab on the inner surface of his ankle that slots into a locating hole on the sprocket of the bicycle. The figure slots positively into place. Perhaps too positively as there's no significant 'wiggle room' once it's on.
The handle bars glue into place but the hole into which the front upright of the bike slots is perhaps a little large. This would give a little room for adjustment but the wheels are positioned straight fore and aft so the handlebars can't really be positioned other than perpendicular to the frame of the bike.
Having glued in place rider and handlebars we then need to attach an arm (or in some cases two) between shoulder and hand-grip. Needless to say, the arms don't fit positively to the shoulders, they are a little over sized making some of the figures look like they have on American football armour, and I've yet to find a compilation of figure and arm that reaches the right distance from shoulder to handlebar.
I'm hoping a combination of UHU glue and an overall coating with PVA will make the figures strong enough to use but these guys may be consigned to the spares box before Crisis Point.
Friday, March 10, 2017
Feldgrau
Going though an old drive location and clearing out unwanted image files I found this...
Can I suggest that we don't need to sweat the exact colour of field grey on our German figures?
Can I suggest that we don't need to sweat the exact colour of field grey on our German figures?
Sunday, March 5, 2017
Somewhere in Germany
A few weeks back I met up with old gaming mate Graham for the first time in ages. In the course of wide-ranging conversation I managed to persuade Graham that he owed it to himself, as a lapsed WW2 skirmish gamer, to try Chain of Command. And yesterday we did.
I set up a small (3'x4') but densely covered table using most of my mid-twentieth century European buildings.
We played scenario one - The Patrol. It's not my favourite CoC scenario but it's probably the best suited to a new player. I took the Soviets because I thought Graham would find the Germans the easier force to use. If all else fails just find a good position and rely on your MG42s!
After the patrol phase we ended up with Jump Off Points thus...
The isolated Soviet JOP in the foreground and the two German ones clustered together would prove crucial later on.
Graham had two points of support but rather than delay the start while he chose what to take, I'd allocated him the adjutant and a medical orderly before the game. With five points to spend I took the elite scout squad.
Unfortunately, I was so busy explaining the rules that I forgot to take photos until more than halfway through the game.
I strongly advised Graham that putting his troops on the table as early as possible wasn't necessarily the best policy but he was keen to get things on so he could try the rules so he soon ended up with all his forces on table, garrisoning the two big buildings either side of the main square. I pushed my scout squad into the cellar of the fairly intact building nearest the goods shed. This put the almost completely demolished building (it has an intact cellar) between our two forces.
The third building facing the square is 'The Important Building' (of considerable Andreivian fame). Graham rushed forward an infantry rifle team to try and take it. As he reached the front door I got a rifle squad into the rear yard. I then spent a Chain of Command die to interrupt Graham's turn and rush my chaps in via the back doors.
This put up within 4"of each other so a close combat happened. With neither side established in the building I didn't count the Soviets as defending hard cover but even so they were able to rout the German across the square and off the board.
I set about defending the building and eventually pushed another squad into the yard at the rear. This model doesn't allow access to the interior; the figures on the roof are actually on the ground floor.
Graham had two squads and his platoon commander in the double building below. To the right you can see the almost-completely-demolished-building. After a couple of phases I decided to advance my scouts into its cellar.
At this point it looked like the action was bogging down into a static shooting match. Although I was ahead on points (Graham was down to about 6 on force morale whilst I was still on 10) I knew I couldn't win that way. I needed to manoeuvre.
I finally deployed my last remaining squad, with my platoon commander, in the goods yard on my right flank.
They began to double forward, the squad leader and the platoon commander rallying off shock points as they went.
Simultaneously (but unphotographed) the elite scouts launched a close assault on the cellar of the double building, Graham's main position, wiping out the rifle team defending it.
Despite some dodgy movement dice and some incoming fire, the third squad completed its end-run and managed to capture both of Graham's left flank JOPs. This left me in possession of the entire ground floor of Graham's key position.
At this point we had to call the game as it was five o'clock. If the current turn was to end anytime soon Graham was likely to lose more force morale as a result of the lost JOPs so we were comfortable calling it a Soviet victory.
We both enjoyed the game and Graham's keen to play again so I call that a success!
I set up a small (3'x4') but densely covered table using most of my mid-twentieth century European buildings.
We played scenario one - The Patrol. It's not my favourite CoC scenario but it's probably the best suited to a new player. I took the Soviets because I thought Graham would find the Germans the easier force to use. If all else fails just find a good position and rely on your MG42s!
After the patrol phase we ended up with Jump Off Points thus...
 |
| Red stars for the Soviets, black/red circles for the Germans |
Graham had two points of support but rather than delay the start while he chose what to take, I'd allocated him the adjutant and a medical orderly before the game. With five points to spend I took the elite scout squad.
Unfortunately, I was so busy explaining the rules that I forgot to take photos until more than halfway through the game.
I strongly advised Graham that putting his troops on the table as early as possible wasn't necessarily the best policy but he was keen to get things on so he could try the rules so he soon ended up with all his forces on table, garrisoning the two big buildings either side of the main square. I pushed my scout squad into the cellar of the fairly intact building nearest the goods shed. This put the almost completely demolished building (it has an intact cellar) between our two forces.
The third building facing the square is 'The Important Building' (of considerable Andreivian fame). Graham rushed forward an infantry rifle team to try and take it. As he reached the front door I got a rifle squad into the rear yard. I then spent a Chain of Command die to interrupt Graham's turn and rush my chaps in via the back doors.
This put up within 4"of each other so a close combat happened. With neither side established in the building I didn't count the Soviets as defending hard cover but even so they were able to rout the German across the square and off the board.
I set about defending the building and eventually pushed another squad into the yard at the rear. This model doesn't allow access to the interior; the figures on the roof are actually on the ground floor.
Graham had two squads and his platoon commander in the double building below. To the right you can see the almost-completely-demolished-building. After a couple of phases I decided to advance my scouts into its cellar.
At this point it looked like the action was bogging down into a static shooting match. Although I was ahead on points (Graham was down to about 6 on force morale whilst I was still on 10) I knew I couldn't win that way. I needed to manoeuvre.
I finally deployed my last remaining squad, with my platoon commander, in the goods yard on my right flank.
They began to double forward, the squad leader and the platoon commander rallying off shock points as they went.
Simultaneously (but unphotographed) the elite scouts launched a close assault on the cellar of the double building, Graham's main position, wiping out the rifle team defending it.
Despite some dodgy movement dice and some incoming fire, the third squad completed its end-run and managed to capture both of Graham's left flank JOPs. This left me in possession of the entire ground floor of Graham's key position.
At this point we had to call the game as it was five o'clock. If the current turn was to end anytime soon Graham was likely to lose more force morale as a result of the lost JOPs so we were comfortable calling it a Soviet victory.
We both enjoyed the game and Graham's keen to play again so I call that a success!
Subscribe to:
Posts (Atom)


